- Things To Do
- Aerial Parks & Zipline Tours
- Art Galleries
- Biking
- Camping
- Drive in Theater
- Farms & Farmers Market
- Fishing
- Golf
- Hiking and Backpacking
- Horseback Riding
- Hot Springs
- Hunting
- Libations Loop
- Museums Historical Tours
- Live Music
- OHV
- Pickleball
- Rock Climbing
- Rock Hounding & Gold Panning
- Scenic Drives
- Shopping
- Trail Running
- Winter Activities
- Whitewater Parks
- Whitewater Rafting
- Wildlife Watching
- Restaurants
- Outdoors
- Events
- Lodging
- FREE VISITOR GUIDE
- Home
- Plan Your Visit
- Be Prepared in the Winter
Be Prepared in the Winter
Clothing – Your clothing needs depend on the weather and your body type. As a general rule, use several thin layers that you can add or shed. Always wear synthetic or wool long underwear next to the skin to wick moisture away from your core. Try to wear just enough to stay warm without sweating. Sweat freezes when the temperature drops.
Always bring a thick warm layer, waterproof parka and pants and an extra set of gloves and socks. If you don’t have the appropriate clothing for the conditions, go home and get the right gear, or just skip it and drink hot chocolate.
Equipment – All the tours in this book are appropriate for lightweight cross-country skis or snowshoes. Beginners, or people who don’t want to ski fast, may want to use snowshoes on trails with steeper terrain or challenging snow conditions.
Newer, modern snowshoes work well in all conditions. If you’re bigger and/or carrying a lot of gear, use a larger snowshoe. For those who want to run the trails, choose a snowshoe designed for speed. Most people like to use poles as well – for balance and a better upper body workout.
For the steepest tours, in the worst snow, a single camber telemark ski gives control and confidence on the descents while still touring well on the flats and hills. Climbing skins are useful for tours with steep climbs, particularly with hard or icy snow.
Our personal favorite is a double cambered, metal edge ski with a sturdy plastic boot. 3-pin, NNN BC or Salomon SNS BC bindings are all good, it just depends on what your boot requires.
The length of time you plan to be out, and difficulty of the route, also play a part in planning and gear selection. Even on easy and short routes, remember you cannot predict if an accident may happen, so be prepared.
A more complete list of equipment includes:
Skis/Snowshoes, Boots, Poles
Comfortable Pack
Food and Water (hot drinks in a thermos are often worth their weight in gold)
Clothing
GPS and/or Compass
Maps
Firestarter – cotton balls packed full of petroleum jelly and stored in a film canister
2 Lighters – one is a back up
Headlamp and Extra Batteries
Emergency Whistle
Space Blanket or Bivy Sac
First Aid Kit
Pocket Knife
Toilet Paper – you know why.
Chemically Activated Hand and Feet Warmers
Watch
Moleskin, or similar product, to prevent blisters.
If in avalanche terrain:
Knowledge
Beacon
Probe
Shovel
A partner or two.
First Aid – Prevention and planning remains the best way to avoid accidents or emergencies. Always travel routes within your limits. If you are skiing with someone for the first time, learn their first aid experience, and if they have any relevant medical conditions. At the absolute minimum, carry a First Aid kit and know how to use it. Even better, make sure someone in your group is qualified as a Wilderness First Responder or Wilderness EMT.
Altitude – If you come from an area where the corn is the highest thing on the horizon, altitude acclimatization and sickness must be factored into your planning. Altitude illnesses are caused by hypoxia, insufficient oxygen in the blood for the body to function normally. Hypoxia is caused by decreased barometric pressure at higher altitudes. Higher altitudes can be anything above 4,000 feet, but symptoms rarely occur below 8,000 feet. All the routes in this book are well over 8,000 feet.
Everyone acclimatizes at different rates and there is no exact formula to tell you how to acclimate properly. The best option is to take it easy the first 2 to 3 days at altitude and try to sleep at low altitude, like near Salida at 7,000 feet. Adequate hydration and nutrition are both vital to acclimatizing well.
Acute mountain sickness (AMS) is the most common form of altitude sickness in this region and symptoms can appear as quickly as six hours after arriving. Most commonly they occur within 48 hours of arriving at 8,000 feet or above. Symptoms range from mild to severe and usually start with a headache. Additional symptoms include loss of appetite, nausea, difficulty sleeping, lassitude, unusual fatigue and shortness of breath on exertion.
If you have these symptoms, take the day off and spend the day warming the chairs of bakeries in Salida. Drink lots of water, enough to keep your urine frequent and clear, and eat lots of carbohydrates. Avoid respiratory depressants like alcohol or sleeping pills for the first 2 to 3 days at altitude. If ignored, AMS can lead to more severe altitude illness with the end result being death. Don’t mess around.
Water and Food – The entire Upper Arkansas Valley is high as a kite and dryer than a raisin in the Mojave. It’s important to stay sufficiently hydrated – at this altitude you need 1-1.5 gallons a day for optimal performance. Staying hydrated also helps prevent altitude sickness. We recommend traveling with a 100 ounce water bladder in your pack, outfitted with an insulated hose – don’t forget to hold it above your head and drain the hose after every drink to keep the water from freezing. In addition, bring a thermos filled with hot drinks (hot drinks often make you more popular in the backcountry and this is always a bonus).
If you run out of water, either melt snow (if you have a stove) or try to get water from an unfrozen stream. However, the water from every spring or creek needs to be purified before you drink it, even in winter. An enemy lurks in Rocky Mountain water and goes by the Latin label of Giardia lamblia. A waterborne parasite, Giardia is an evil beast that causes severe gastrointestinal problems and leads to unpleasant happenings in your ski pants. Do not drink untreated water unless it is an emergency.
The body burns many more calories in the cold, so food in the belly means your energy level stays higher and your body stays warmer. Snack all day, even if you’re on a diet. Always carry energy bars and gel pouches in your pack, along with more substantial fare like ham sandwiches or leftover pizza. Other good alternatives are trail mix or peanuts with raisins. On long days, use an energy drink to replace electrolytes. To start the day off right, eat a big breakfast before you head out.
Weather – Winter in the high Colorado mountains can be a harsh mistress and she will make you pay if you’re not prepared. A friend of mine who successfully climbed Everest and Ama Dablam told me the only time he got frostbite was when skiing in this area of Colorado and got caught out at night. The trail they chose was too long and they had to spend the night out without proper gear.
Always check the weather to know what to expect. At any time during the winter you may encounter extremely cold temperatures with windy conditions. In these conditions, hypothermia and frostbite become a definite possibility. In addition, storms blow in fast and can result in whiteout conditions with near zero visibility. Be aware of the conditions and be prepared with the proper clothing and navigational aids. Most days here are sunny, but it’s the ones that aren’t that you’ll remember years from now.
Hypothermia – Hypothermia occurs when the body loses heat faster than it produces heat and the core temperature starts to drop. It can be brought on by dehydration, not eating enough and fatigue – all common occurrences in backcountry winter travel. The best way to treat hypothermia is not to let it happen in the first place – stay hydrated, dry, pace yourself to avoid overexertion, know the symptoms of hypothermia and know the terrain and weather conditions you’re likely to encounter.
Signs and symptoms of mild hypothermia:
1. Loss of fine motor skills – “stumbles and fumbles”
2. Normal thought processes become impaired – “mild stupidity”
3. Lack of sound judgment and confusion
4. Apathy – they do not care what is going on
5. Pale and cool skin
Signs and symptoms of moderate hypothermia:
1. Uncontrolled shivering
2. Slurred speech – “can’t talk”
3. Increased level of confusion
4. Increased stumbling and fumbling
5. Cold and pale skin – may look unusual
Mild and moderate hypothermia must be treated immediately to stop the person from deteriorating into the life-threatening symptoms of severe hypothermia. The most important initial action is to change the environment of the affected person from cold and wet to warm and dry:
* Help them put on dry clothes
* Help the person put on more layers of clothes to increase the level of insulation.
* If the person is sitting, put them on a pad or pack to insulate them from the ground. Make sure the person is wearing windproof and waterproof gear.
* Get them in some sort of shelter – out of the wet and wind.
* Encourage the person to drink liquids (not caffeine or alcohol) and eat sugary foods.
* Do not try to suppress shivering by external warming sources (fire) because the fastest way to warm the person is placing them in dry, increased insulation and letting them shiver so they warm up from the inside out.
* Rewarm the person more quickly by adding heat sources like hot water bottles (pour the hot tea from the thermos into a bottle) or chemical heating packs. They help the most when placed in the hands or on the feet. Do not put them on the person’s bare skin or it may burn them.
You must treat hypothermia when the symptoms become apparent, not later. Letting a mild case develop into a severe case may lead to the death of your friend. Once the person gets warm again and stops losing heat, it’s time to go home.
Frostbite – Frostbite occurs when the skin freezes, most commonly on the nose, fingers, ears and toes – places commonly exposed. Most frostbite can be avoided by wearing the appropriate clothing, staying hydrated, eating enough to keep your energy high, being aware of how your body feels and what bits you are exposing.
The most common sign of mild frostbite, or frostnip, is skin that looks waxy or white and is numb and cold to the touch. In the field, warm these areas with cold skin to warm skin contact – put fingers in underarms or your feet on your partner’s belly. In cases of more severe frostbite, it’s time to get out of the backcountry and receive professional treatment to prevent further damage. The signs of more severe frostbite are the same as the mild symptoms, except that the affected skin is no longer pliable – if it’s cold and hard, it’s time to head to the hospital.
With both hypothermia and frostbite, learn more about them before heading into the backcountry. The place to learn this is not here, but rather in a book or course devoted specifically to backcountry medicine. These books can be found at the library and at nearly any outdoor shop worth its salt.
Avalanche Danger – Every year people die in avalanches in the Upper Arkansas Valley. Although most of the routes featured in this book involve little or no avalanche danger, if you travel the routes that do, possess a firm knowledge of avalanche danger mitigation and how to rescue your partners if caught in a slide. We know that it’s tempting to travel off-route or try tempting turns down a snowfield, but if you do not know what you are doing, you may pay with your life. The Colorado Rocky Mountains harbor some of the most unstable, dangerous backcountry snow conditions in the world and this book is not the place to learn about avalanche safety.
Please educate yourself professionally by attending Avalanche I and II courses – call Headwaters Outdoor Equipment in Salida for information on courses locally (719-539-4506).
For current snow and avalanche conditions, visit the Colorado Avalanche Information Center website (http://geosurvey.state.co.us/avalanche/) and click on the Sawatch Range.
Emergency Procedures – In the backcountry, the ski patrol is not just a call away. Talk with your partners and make an emergency plan beforehand. Don’t forget the simple things like bringing the First Aid kit and letting everyone know where the key to the truck is hidden.
* Make sure someone responsible knows where you are going and when you expect to be back. However, don’t count on this as your rescue plan – be responsible for yourself.
* Your cell phone is not an emergency plan.
* Ski or snowshoe within your limits and don’t take silly chances.
* Make sure everyone in your group has basic First Aid knowledge and preferably advanced Wilderness First Aid experience.
* If you need a rescue and there are only two of you, make sure the injured person is warm, insulated from the snow and in a safe location before you leave. Mark the spot on your map accurately so rescuers can locate the injured person.
* Do not expend all your personal energy reserves on the way out – be ready to lead the rescuers back to your injured friend.
Be Prepared in the Winter
Published with permission from the guide book:
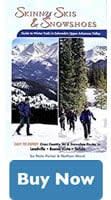
Skinny Skis and Snowshoes – Guide to Winter Trails in Colorado’s Upper Arkansas Valley by Nate Porter and Nathan Ward.
This guidebook gives detailed information on 25 of the best backcountry ski and snowshoe routes in the Upper Arkansas Valley, with trails for every ability level. If you count all the options presented for each trail, the actual number of routes is closer to 60 without even counting the individual trails at the Nordic centers – that is a lot of skiing. If you’re insatiable and need more, look at the sections titled: Other Areas to Explore. Be insatiable.
Ski & Snowshoe With Care
Backcountry travel is a physically strenuous activity with many risks and dangers. Hazards, natural or manmade, whether noted in this book or not, can be encountered at any time, under any situation. As a backcountry traveler we assume you know your personal abilities, limitations and have a comprehensive background in avalanche safety.
This book represents nothing more than a guide to routes and is not meant to replace your common sense, your ability to navigate in the wilderness or your ability to travel in the backcountry safely.
The mileages, routes and waypoints listed in this text are only suggestions. There may be variances and changes, you may get lost. We recommend that everyone use a global positioning system and topographical map to navigate.
Most routes in this text are located on public land, but some trails pass through or adjacent to private land. Respect the landowner’s rights and obey all signs regarding trail use.
Neither the authors, nor the publisher, nor anyone else mentioned in this book are responsible or liable in any way for any accident, injury or any action brought against anyone traveling any route listed in this book. All backcountry travelers and their companions assume responsibility for themselves. Explore at your own risk, and always tell somewhere where you are going and when you’ll be back.
WINTER TRAIL ETIQUETTE
The winter backcountry is becoming more popular in the Upper Arkansas Valley, which means you need to think of your neighbors while out on the trail. There are no hard and fast rules, but please consider the following:
CORSAR CARD
If you require search and rescue services, it can be costly. Buy a Colorado Outdoor Recreation Search and Rescue (CORSAR) card to protect yourself. Funds from the CORSAR program go into the Colorado Search and Rescue (SAR) Fund. If a CORSAR card holder becomes lost or injured in the backcountry, the Colorado SAR Fund pays eligible search and rescue expenses.
WINTER BE PREPARED
We want you to have a safe and enjoyable trip into Colorado’s backcountry. Be prepared it could be a long walk out. Be sure to read this list of equipment you should bring on your ride along with tips to make your biking trip more enjoyable.
Buena Vista Chamber of Commerce
111 E Main St
Buena Vista, CO 81211
Salida Chamber of Commerce
406 W Rainbow Blvd.
Salida, CO 81201
© Chaffee County Visitors Bureau | All Rights Reserved
Site developed by ![]() Agency Tourism Marketing
Agency Tourism Marketing


